Konzept, Chapter 1: The Basics
OK, so let's get started! Let's quickly conjure an environment to play around in. We are going to use create-react-app and follow the instructions to set up a project with typescript support by executing the following command in the shell:
npx create-react-app konzept --template typescript
This creates a project to play around in. I don't know about you, but I usually clean up the CRA templates a bit by removing stuff I am sure I won't need. In case you are interested, you can check out my initial empty project on GitHub.
Now, let's install Slate, the framework we're going to use for the remainder of this tutorial.
We do this by typing:
npm install slate slate-react
Next, we're going to create a new folder called Konzept, in which we place an index.tsx with the following contents:
import { useMemo, useState } from "react";
import { Editable, withReact, Slate } from "slate-react";
import { createEditor, Descendant } from "slate";
import { ReactEditor } from "slate-react";
import { BaseEditor } from "slate";

type Text = {
  text: string;
};
type Editor = BaseEditor & ReactEditor;
type Paragraph = {
  type: "paragraph";
  children: Text[];
};
declare module "slate" {
  interface CustomTypes {
    Editor: Editor;
    Element: Paragraph;
    Text: Text;
  }
}
const initialValue: Descendant[] = [
  {
    type: "paragraph",
    children: [{ text: "" }],
  },
];

export default function Konzept() {
  const [value, setValue] = useState<Descendant[]>(initialValue);
  const editor = useMemo(() => withReact(createEditor()), []);
  return (
    <Slate editor={editor} value={value} onChange={(value) => setValue(value)}>
      <Editable spellCheck autoFocus />
    </Slate>
  );
}
Wow, that's a lot in one step! But don't worry, we're going to unpack all this as we go along and refactor this a bit here and there. But first and foremost - you should be able to enter text now in your app. Neat! View the full commit on GitHub if you are unsure.
Before we go deeper down the rabbit hole, we have to disable Create-React-App's smart way of reloading as soon as we change a file, as it unfortunately conflicts with Slate. We do this by adding a file called .env into our root directory, which contains the following line:
FAST_REFRESH="false"
Now, let's unwrap the big change one by one, starting at the function Konzept. First, it defines a state object called value. This will hold our editor state, and we will talk about this in much detail later on. Notice the type Decendant[]? We look into this in a second.
We use useMemo to create a new editor object once, and in this line, we see a typical Slate pattern in action: The way Slate plugins usually work is that they provide a function which takes an Editor, enriches it with its functionality and returns it. In this case, createEditor creates a new Editor object, and the plugin withReact extends it with react-specific functionality before returning it to us.
We then pass this, along with the editor's value, to Slate, which is a provider around the actual Editable, which is nothing more than a div with contentEditable=true and some other values set. You can see that we have enabled spell checking and set it to automatically claim the focus, which are both things we would expect from a real text editor.
Now, let's take a closer look at the rest of the code. We need to use the module declaration to make TypeScript play nicely with Slate. Essentially, we use this line to declare what an Editor, an Element and a Text is.
Let's start with the Editor, as this is, from our perspective, the most boring part: Since we extend the original Slate editor with Slate-React, it's probably not surprising that our Editor type is a union of these two. We will leave this as it is for the remainder of the tutorial.
Now, Texts and Elements are more interesting. The way Slate represents its state internally is closely related to the tree-like structure of the DOM, and Slate distinguishes between the nodes in this tree, called Element nodes, and the leaves, which are Text nodes. We declare our Text nodes in a very basic waay, simply stating that a Text node is an object with a property called text. That's it. Our Elements are only slightly more complex: They are objects with a key called "type" set to "paragraph", and an array of Text nodes.
With this knowledge, it's easy to see that the final missing piece of our code, initialValue, is a simple valid tree structure which conforms to our own definition: It has one Element, which in turn has one Text node, which is empty. The type Descendant, by the way, only means "Either Element or Text".
This has all been quite theoretical, so let's make this a bit more concrete by changing our editor a tiny bit:
export default function Konzept() {
const [value, setValue] = useState<Descendant[]>(initialValue);
const editor = useMemo(() => withReact(createEditor()), []);
return (
<>
<Slate
editor={editor}
value={value}
onChange={(value) => setValue(value)}
>
<Editable spellCheck autoFocus />
</Slate>
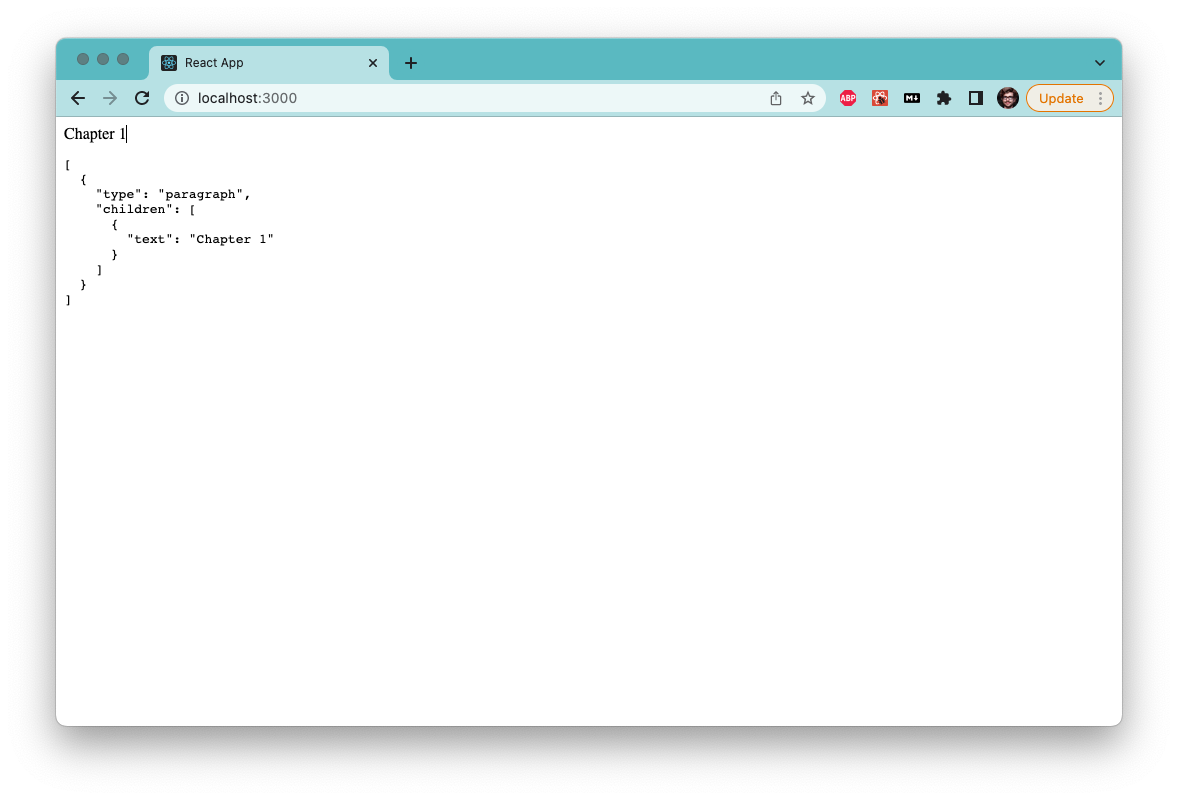
<pre>{JSON.stringify(value, null, 2)}</pre>
</>
);
}
With this change, we make the current state visible right below the editor. This will be super helpful for our learning as our data model grows! I encourage you to play around with it. How does it change when you add text? When you hit enter? When you delete text?
You can take this a bit further by investigating what happens if you would change the data model that we have just introduced. For example, the type: "paragraph" on our Element is pretty useless currently - what happens if we remove it entirely? What happens if we add another property hello: "world"?
Conclusion
In this chapter, we have set up Slate with a basic data model. We are now able to add, edit or delete text to our heart's desire, and we can observe how the internal state changes while we do this. This is neat, and since the editor state is simple JSON, we can easily imagine how we could serialize the editor state into a database and retrieve it later, should we be so inclined.
The next step will be to add some formatting to the editor, because unformatted text is a bit boring. Let's tackle this in Chapter 2.