hecto, Chapter 7: Syntax Highlighting
Table of Contents
- Introduction
- Chapter 1: Setup
- Chapter 2: Entering Raw Mode
- Chapter 3: Raw Input and Output
- Chapter 4: A Text Viewer
- Chapter 5: A Text Editor
- Chapter 6: Search
- Chapter 7: Syntax Highlighting 📍 You are here
- Appendices
- Change Log
Chapter 7: Syntax Highlighting
We are almost done with our text editor - we’re only missing some syntax highlighting.
Assignment 32: Colourful Digits
Let’s start by just getting some highlighting done, as simply as possible. We’ll attempt to highlight numbers by colouring each digit character red.
To do so, we will iterate over all characters within a string, and apply colouring in case it’s a digit.
Here’s a Rust Playground to help us with this:
fn main() {
    let haystack = String::from("And A-1, A-2, A-1,2,3!");
    for ch in haystack.chars() {
        if ch.is_ascii_digit() {
            println!("Found digit: {}",ch);
        }
    }
}
Here is the assignment:
- In the simplest possible way, implement highlighting digits.
Code Review: This is how I solved it.
Setting up the architecture for highlighting
Before we dive deeper into highlighting, we have to discuss architectural considerations first. Let me first lay out the problem space to you, and then explain how I intend to solve it in scope of the tutorial. There are multiple ways to solve this, feel free to pick your own.
Currently, our simplistic highlighting functionality lives within Line. That will work for most, but not all of the cases: There are comments which can span multiple lines, like this:
// This is a regular comment
/*
This is a multi line comment
It goes on
And on
until here: */
To properly highlight this, we need to have information about the previous line available: If it ends within a multi line comment, the current line starts within a multi line comment.
This also poses a bit of a challenge when it comes to updating the highlighting information: We cannot infer that any change only affects the highlighting in the line itself - if you start a multi line comment, all subsequent lines will need to be re-highlighted.
At this point, what matters is: The highlighting logic needs to move out of the Line.
We could move it into the surrounding struct, Buffer, and steer the highlighting from there, maybe storing the highlighting information itself (in case of my code: the annotations) in Line.
This is, in fact, how I solved this in earlier iterations of hecto:
- I had defined an enum that determined the highlighting type
- Each
Linecontained a vector of these highlighting types, one per character within the line - It was the responsibility of the surrounding struct to ensure that this vector was always in sync with the document itself, very similar to how we’re currently ensuring that the vector of fragments is in sync with the string within
Line.
It’s a valid, viable approach.
In this iteration of hecto, I will go down a different road, which is a bit closer to how other text editors are implementing this: I am going to create a separate structure which is only concerned about highlighting. It will store, for each line, the highlighting information, which is then passed to Line upon building the final, annotated string. My implementation will focus on simplicity, not performance, but with this setup it will be easier to do performance tweaks later on - for example by re-highlighting the document only until the edge of the currently-visible screen.
Take your pick! I do not believe either of the two approaches is much easier to implement than the other though.
What about Search Results?
Should the highlighting of Search Results also move out of Line? The answer is: It doesn’t have to. If “highlighting” means to you “make text colorful”, then it sounds like colourful search results should move alongside colourful code syntax. If “highlighting” means to you “syntax highlighting”, then it sounds like search result highlighting should stay where it is. hecto doesn’t support multi-line search, and syntax highlighting doesn’t influence the highlighting of search results, so it doesn’t really matter.
I am going to move it, though.
Assignment 33: Find a Place For Highlighting
The assignment is pretty straightforward:
- Decide on a way forward for your highlighting.
- Move your existing highlighting logic accordingly.
Assignment 33: Code Review
I used a new data structure: A HashMap . I did this because I didn’t want to reason about the order in which the highlighting happens - and also because I think it’s an important data structure to introduce.
Here’s a Rust Tutorial to meet it properly:
use std::collections::HashMap;

fn main() {
    // Create a new HashMap
    let mut scores = HashMap::new();

    // Insert some key-value pairs
    scores.insertfrom("Alice"), 50;
    scores.insertfrom("Bob"), 40;
    scores.insertfrom("Carol"), 100;

    // Access a value by key
    let alice_score = scores.get("Alice");
    println!("Alice's score: {:?}", alice_score);

    // Check if a key exists and print a message
    if let Some(&score) = scores.get("Bob") {
        println!("Bob's score: {}", score);
    } else {
        println!("Bob's score not found");
    }

    // Update a value
    scores.insertfrom("Alice"), 55;
    println!("Alice's new score: {:?}", scores.get("Alice"));

    // Iterate over all key-value pairs
    println!("All scores:");
    for (key, value) in &scores {
        println!("{}: {}", key, value);
    }

    // Remove a key-value pair
    scores.remove("Carol");
    println!("After removing Carol, scores are:");
    for (key, value) in &scores {
        println!("{}: {}", key, value);
    }
}
Assignment 34: Filetype Detection
Before we go on highlighting things, we’re going to add filetype detection to our editor. This will allow us to have different rules for how to highlight different types of files. For example, text files shouldn’t have any highlighting, and Rust files should highlight numbers, strings, chars, comments and many keywords specific to Rust.
Let me run you through the plan:
- We’re going to need a new enum,
FileType, which has the variantsPlainTextandRust. - On loading or saving, we check whether the file name ends in
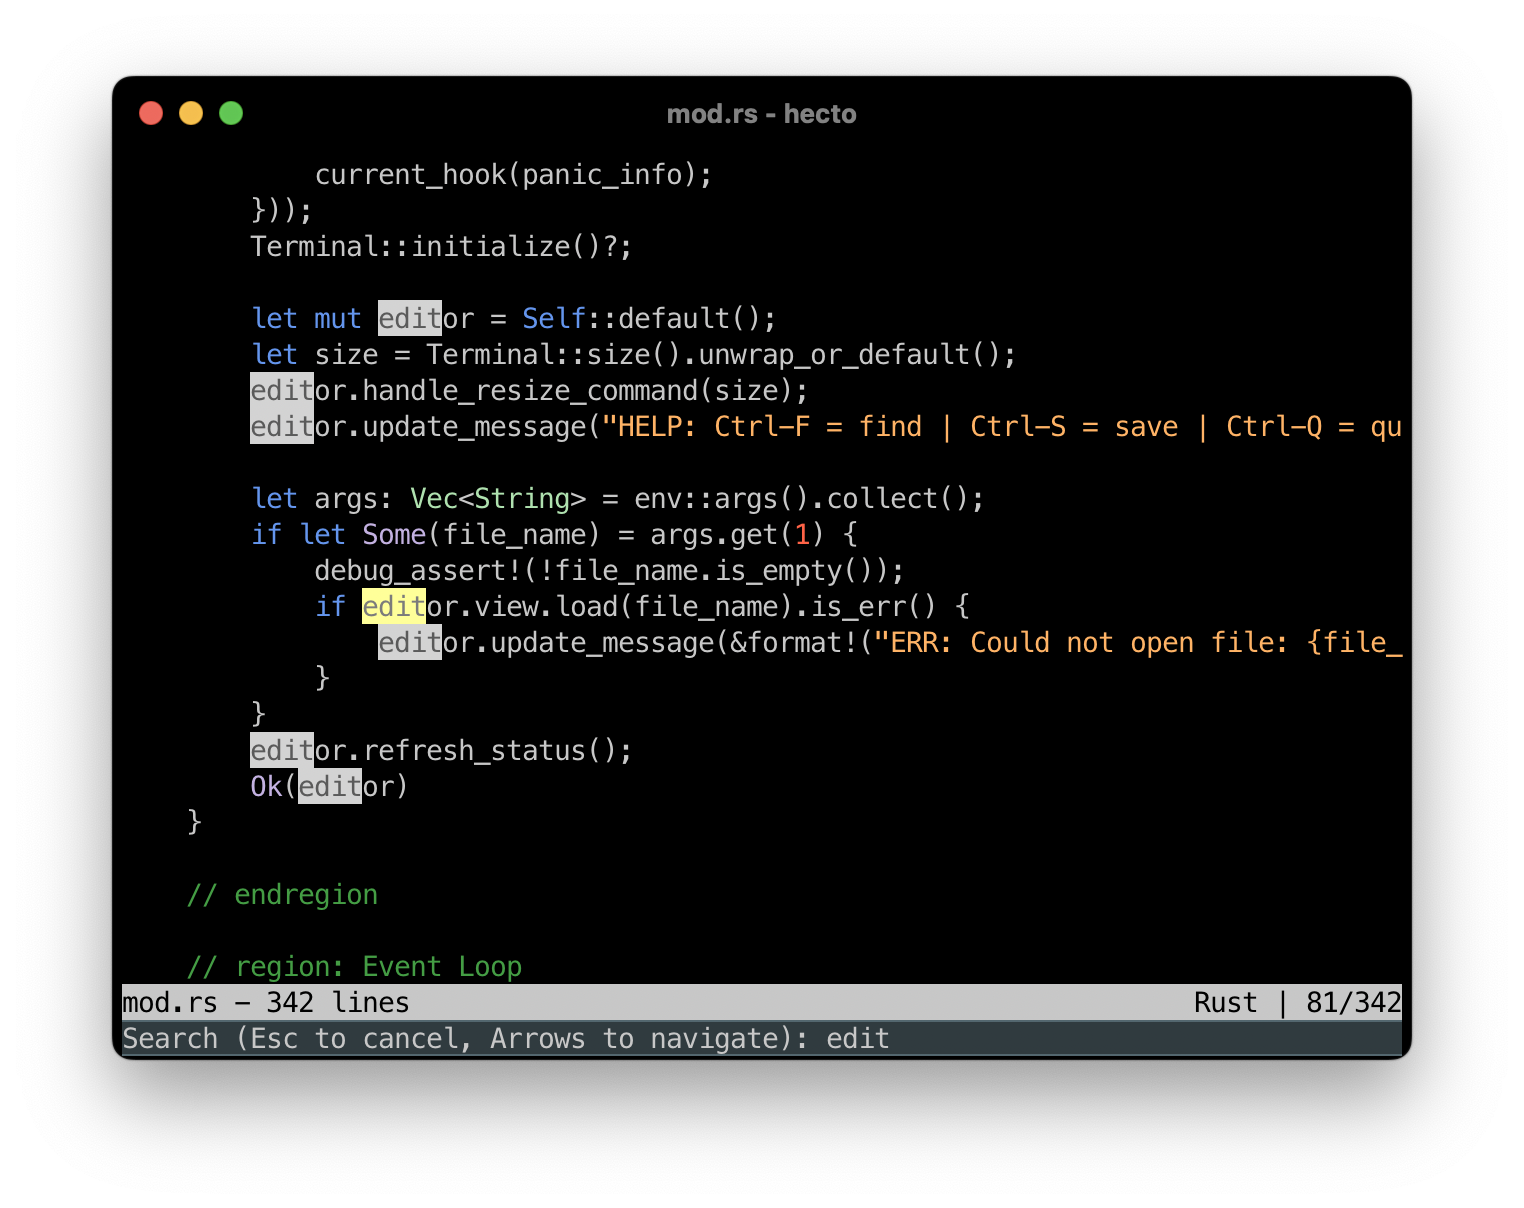
.rs. If it does, it’s a Rust file, if not, it’s a plain text file. - For this assignment, we’re not changing the highlighting yet. We simply display either “Text” or “Rust” next to the Position Indicator in the status bar, so that it looks like this for Rust files:
Rust | 16/417
To check the file type, we can use the function ends_with - or, since we are already working with Path or PathBuf, we can use extension() to retrieve the extension. We can either directly compare that extension, or use eq_ignore_ascii_case to ensure we’re correctly matching the case the extension is in.
Here’s the assignment:
- If a file is a Rust file, display
Rust |next to the position indicator in the Status Bar. - If a file is a plain text file, display
Text |next to the position indicator in the Status Bar. - Ensure that the file type is correctly updated in case a file is saved.
Code Review: This is how I solved it.
Assignment 35: Conditional Highlighting
With this in place, we can now proceed to conditionally highlight numbers: If we’re opening a Rust file, we want to highlight the syntax, if not, we only want Search Result highlighting.
Let’s implement this now:
- When opening a Rust file, highlight digits as before.
- For other text files, do not highlight digits.
- Make sure that saving a new file to a Rust file correctly triggers the highlighting.
Assignment 35: Code Review
In my code, I wanted to showcase a common scenario: We have a generic thing, a Syntax Highlighter, and we can have concrete Syntax Highlighters: One for Rust, one for TOML, you name it. In Rust, this is typically solved with traits, and sure enough: I have implemented a trait called SyntaxHighlighter for the two highlighters which are currently available in my code. Extending this to a third highlighter should therefore be easy.
But my definition for the struct member referencing the Syntax Highlighter looks weird, it looks similar to this:
pub struct Highlighter {
    syntax_highlighter: Box<dyn SyntaxHighlighter>,
    //...
}
In Rust, the type of a field must be fixed and known at compile time. Calling highlighter.syntax_highlighter.highlight(); requires Rust to know where the definition of highlight() is stored. It can only do that if it knows the type of the struct member, knowing where to find it (= the pointer to it) is not sufficient. The philosophy here is that abstractions should not incur runtime overhead, so the access to highlight() should not require additional calculations during runtime to find out where the function definition lives.
In this case, though, we need to have this runtime overhead, and that’s where the Box comes in. We met Boxes earlier, when we discussed panic hooks, and now we’re using one ourselves. By using Box<dyn SyntaxHighlighter> we tell Rust that we want to have dynamic dispatch, meaning that on Runtime, and not on compile time, we need to figure out where the trait methods for the given traits live. The struct, Highlighter, stores more than a simple pointer in syntax_highlighter - it stores a smart pointer which points to the target itself and a lookup table which allows Rust, at runtime, to find the correct methods for the concrete SyntaxHighlighter.
Interacting with the box isn’t much different than interacting with the object itself, only creating the Box looks a bit different:
fn create_syntax_highlighter(file_type: FileType) -> Box<dyn SyntaxHighlighter> {
    match file_type {
        FileType::Rust => Box::<RustSyntaxHighlighter>::default(),
 		//...
    }
}
Assignment 36: Colourful Integers and Floats
Alright, let’s start working on highlighting numbers properly. Right now, numbers are highlighted even if they’re part of an identifier, such as the 32 in u32. We should recognise a numeric literal as such only if it’s preceded and succeeded either by a whitespace, or characters like (! " # $ % & ' ( ) * + , - . /.
Our current approach, looping through all characters and adding one annotation per ASCII digit, won’t be sufficient. Instead, what we need to do is to split the string into words, on word boundaries like the punctuation mentioned above as well as whitespace. Then we need to check each word if it’s a number, and add an annotation if that’s the case.
Luckily for us, unicode_segmentation provides us with a way to do the splitting, without us having to do it ourselves. Here’s a Rust Playground to show you how it’s done:
use unicode_segmentation::UnicodeSegmentation;
fn main() {
   let hello = "1 second please, here are some numericals: 1>2 1+1=2; 123 1.23 1_200_3 1e2 0x010 10bdh abc10 1.23.1.23";
   for (index, word) in hello.split_word_bound_indices() {
       println!("{index}: {word}");
   }
}
Here is the assignment:
- Highlight integers, where each character is an ASCII digit.
- Highlight floats: These are numbers which contain exactly one dot (
.), but only if it’s not at the start or end of the number. - Highlight scientific notation, like
50e10. The part before anecan be a float, the part after theemust be an integer. - Highlight integers, floats or scientific numbers with visual separators, where an
_is used as a visual separator, but only if this separator does not appear at the beginning or the end of the word (In other words:1_000or1_000_000should be highlighted,_1_000should not, neither should1_000_) - Here is a test file you can use.
Code Review: Here is my code.
Assignment 37: Colourful Hexadecimal, Binary and Octal Literals
We haven’t yet highlighted all numerical literals Rust knows about - you can write numbers in hexadecimal, binary and octal.
Here is a short Rust Playground to introduce them:
fn main() {
   let binary = 0b1111;
   let octal = 0o17;
   let hexadecimal = 0xF;
   println!("{binary} | {octal} | {hexadecimal}");
}
Parsing them is easy:
- Binary literals start with
0bor0Bfollowed by1s and0s - Octal literals start with
0oor0Ofollowed by the digits0to7 - Hexadecimal literals start with
0xor0Xfollowed by0to9orAtoF.
Rust comes with a convenience function where you supply a base, and Rust checks if the given character is a valid digit given the base:
fn main() {
let chars = vec!['0','1','2','8','F'];

   println!("Char\tbinary?\toctal?\thex?");
   for char in chars {
       println!("{char}\t{}\t{}\t{}", char.is_digit(2),char.is_digit(8),char.is_digit(16));

   }
}
Let’s highlight these as well. Here is the assignment:
- Highlight Hexadecimal literals, starting with
0xor0Xand followed by hexadecimal digits (0-9,A-F) - Highlight Binary Literals, starting with
0bor0Band followed by1and0 - Highlight Octal literals, starting with
0oor0O, followed by octal digits (0-7) - Here is a test file you can use.
Code Review: Here is my code.
Assignment 38: Colourful Keywords, Types and Literals
Now that we have the ability to check strings word for word, it’s time to highlight some words!
Keywords are defined in the manual here and are words like if, else, match and so on. From that list, we will ignore ’static for now. Let’s use a blue color for keywords.
We also want to highlight some frequently-used types. Here is a list:
i8,i16,i32,i64,i128,isizeandu8,u16,u32,u64,u128,usizef32,f64bool,charOption,ResultString,str,Vec,HashMap
Let’s use a green color for types.
Then there are some literals and enum variants:
Some,None,Ok,Err,true,false
Let’s use a purple color for these.
Here is the assignment:
- Highlight the keywords above appropriately. Feel free to amend the respective lists if you think there are more things worth highlighting.
Code Review: Here is how I solved it.
Assignment 39: Colourful Chars
We now need to go beyond the word-by-word parsing of the previous steps: We want to properly highlight characters. To do this, we need to highlight everything between two 's - we will not go as far as checking if everything between the two ' s actually is a valid character, so we will highlight 'definitelynotachar' despite it not being a character.
But things aren’t as easy as looking for the closing ' and then attempting to parse everything in between, because ' itself is also a character! To represent it, we need to tell Rust that this occurrence is not meant to end the character, and we do this by prefixing it with a \ (which is called an Escape Character - not to be confused with a different type of Escape Character we met earlier) - so the character ' is represented by '\'' . For characters, we can assume that a \ occurs at most once: directly after the opening quote.
We can’t parse word by word any more, as ’a' shows up as the three words ', a and '. We’re going to adapt our strategy: Instead of passing the word to each parsing function, we will pass a reference to the remaining string. And instead of returning true or false, we are going to return an Annotation - and advance the iterator of the surrounding loop based on the end index of the annotation.
In other words: While parsing This is a char: ‘a’!, we will iterate over the words in that string until we reach the first ’. We then pass the remaining string to the parsing function: ‘a’! . This function will return an Annotation which ends at the end byte index of the second '. We will need to adapt our outer loop to advance until this byte index before proceeding with the highlighting.
Let’s use an Amber color for chars.
Here is the assignment:
- Highlight characters by highlighting everything between an opening and closing
'. - Ignore any escaped
'(i.e.\’) - Here is a small test file.
Code Review: Here is my code
Assignment 40: Colourful Lifetime Specifiers
Now that we are able to highlight characters, let’s also highlight lifetime specifiers. Like chars, they also start with a ’, but unlike chars, they do not come with a closing quote. For our highlighting, we consider ASCII-characters and digits as well as an underscore (_) part of the lifetime specifier and highlight it accordingly. We run this highlighting function after the one for characters, to avoid chars being highlighted as lifetime specifiers.
Let’s use teal for lifetime specifiers.
Here is the assignment:
- Highlight lifetime specifiers: ASCII characters, digits or underscores following a
’ - Ensure that characters are still highlighted properly.
- Here is a text file you can use for testing.
Code Review: Here is my code.
Assignment 41: Colourful Single-Line Comments
Let’s make sure our (single line) comments are highlighted nicely. As you know by now, Rust has two types of single line comments: A regular comment starts with two slashes (//). Everything that follows these two slashes until the end of line is considered a comment. These are for documenting the internals of each function, aimed at developers who are reasoning about the code within your function.
And then there are documentation comments, which start with three slashes: ///. These can show up in the auto-generated documentation and are therefore aimed at the people calling your function and interacting with the return values. Per convention, three-slash comments describe the code that follows this comment. In case you want to document the item the documentation is in (e.g. the crate itself), you can use //!. Here is an example using all three comment types:
//! # Comments
//!
//! A file which showcases all kinds of single-line comments in Rust.

/// A sample struct which is documented with this comment.
struct hecto;

impl hecto {
   /// Outputs Hello, World. This comment shows up in the auto-generated documentation around say_hello.
   fn say_hello() {
   	println!("Hello, World!"); // using a macro here. This comment doesn't show up in the auto-generated documentation.
   }
}
Let’s highlight these. In my opinion (but you might disagree) it doesn’t make a lot of sense to highlight the comment types differently, therefore a simple implementation would only check for // to detect a comment and move on.
Let’s implement this now, and highlight comments in a darker shade of green.
- Highlight single-line comments.
- Ensure that other highlighting doesn’t happen within a comment.
- You can use any of your code files to test (they’re thoroughly commented, right?!)
Code Review: Here is my code.
Assignment 42: Colourful Multi Line Comments
We’re at the back side of this chapter, and we need to take care of a more complex case: Multi line comments.
Multi line comments start with a /*, which can happen anywhere within a line. The entire remainder of that line is considered a comment, and all subsequent lines, until one that contains a */ - and then, the remainder of this line is highlighted regularly.
One caveat is that nested Multi Line comments exist, for example:
/* This is an outer ML comment.
	/* This is an inner one!
		Once this comment ends... */
 ...the text outside is still part of the comment.
*/
This is where our strategy to only highlight one line at a time is no longer sufficient: Highlighting of subsequent lines requires previous lines to have been highlighted as well, and we need to have carried over how many dangling ML comment openers we have seen.
Our strategy will work like this:
- As soon as we encounter a
/*, we continue iterating over the remainder of the string. - We keep track of unclosed ML comments like this:
- We start at 1 (for the first
/*we encountered) - For each subsequent
/*we see, we add 1 - For each subsequent
*/we see, we subtract one
- We start at 1 (for the first
- Once we reach 0, we annotate the given part as a comment and proceed with the regular highlighting.
- If we reach the end of the string before reaching the final
*/, we store the remaining number as a member of our struct. - Before we start with the regular highlighting of the next line, we check if we’re in a ML comment and continue annotating the current line with the same algorithm as above.
Here is the assignment:
- Highlight multi line comments.
- Ensure to properly handle nested comments.
- Here is a test file for you.
Code Review: Here is my code.
Assignment 43: Colourful Strings
We will now wrap up our syntax highlighting by tackling Strings. Strings start and end with a ". Like characters, they can include an escaped ending delimiter, so this is a valid string: ”Look at this: —> \” <— “ .
Like Multi-Line comments, Strings can also span multiple lines! However, unlike multi line comments, there are no “nested strings” to be taken care of.
Let’s highlight them in orange.
Here is the assignment:
- Highlight Strings.
- Ensure to properly handle escaped quotes.
- Ensure to properly handle multi line strings.
- Ensure that you properly handle multi line comments within multi line strings
- Ensure that you properly handle strings within multi line comments.
- Here is a test file you can use.
Code Review: Here is my code.
Assignment 44: Finishing Touches
Congratulations! hecto is now feature-complete and (of course!) bug free. Let’s now do some finishing touches.
- Let’s ensure all our dependencies are up to date by running
cargo update. - Create a release build with
cargo build --release. Compare the size of the executable with the one created by the regular build. - Then, use this release build to update the
Cargo.toml- set the version number to1.0.0 - Pat yourself on the back.
Wrap Up and Outlook
This concludes our feature set - and the tutorial at this point. We added basic syntax highlighting to hecto, which highlights keywords, strings, multi-line comments and much more. Check out the appendix if you’re looking for inspirations about how to take hecto even further!