hecto, Chapter 5: A Text Editor
Table of Contents
- Introduction
- Chapter 1: Setup
- Chapter 2: Entering Raw Mode
- Chapter 3: Raw Input and Output
- Chapter 4: A Text Viewer
- Chapter 5: A Text Editor 📍 You are here
- Chapter 6: Search
- Chapter 7: Syntax Highlighting
- Appendices
- Change Log
Chapter 5: A Text Editor
Now that hecto can read files, let’s see if we can teach it to edit files as well. This chapter will be lighter on new concepts, and heavier on assignments to extend hecto.
Assignment 15: Insert ordinary characters
Let’s first focus on adding ordinary characters into the text. Since we can’t know if that character will trigger the formation of a new grapheme cluster, we will need to rebuild our internal structure for Line upon insertion.
One thing to watch out for here is movement: What the user perceives as an insert is actually an insert followed by a step to the right - otherwise we’d be typing backwards. Another aspect to consider is, of course, graphemes and grapheme clusters. It’s entirely possible for the inserted character to become part of an existing grapheme cluster - in which case any extra movement would result in moving the caret too far to the right. Or, the newly inserted character could cause the graphemes left and right to merge - think about adding a Handshake Emoji at the right place among Adult Emojis and Zero Width Joiners - they’d then all form the Adults Holding Hands Emoji, thus actually removing graphemes.
Our strategy to tackle this topic will be to check if the amount of graphemes has changed post-edit: if it grew, we move, otherwise we stay where we are. For anything other than growing after insertion of a new character, we can’t know how far in any direction we should move. This should cover the cases we aim for with hecto.
Here is the assignment:
- Stop crashing on unsupported key presses even in debug mode. We want to silently ignore them.
- Add a new command to handle keypresses of ordinary characters. Find the list of
KeyCodes emitted bycrosstermhere. - Add the character to the line by first building up a string based on the TextFragments until the insertion point, then adding the new character, and then appending the remaining graphemes from the remaining TextFragments. Then, rebuild the internal data structure for
Line. - Handle the case where insertion is attempted below the last line of the document by creating a new
Lineand appending it to yourBuffer. - You need to move after inserting a character, as indicated above.
- Hint: Get a mutable reference to a vector member by using
get_mutinstead ofget.
Code Review: Here is my code.
Assignment 16: Simple Deletion
Now we want Delete and Backspace to work. Backspace is essentially a “move left, then delete”. Delete will work pretty similar to insert above, with the difference that we have to worry even less about grapheme widths - deleting one cluster should in the vast majority of cases decrease the amount of graphemes by 1. We’ll handle deletion around the edges of a row later.
Here is the assignment:
- On
Deletebefore the end of a row, remove the grapheme cluster to the right of the caret. - On
Backspaceafter the start of a row, go one step to the left and then remove the grapheme cluster to the right of the caret. - Ignore deleting at the start/end of a row for this assignment.
Code Review: Here is how I did it.
Assignment 17: Complex Deletion
We now want some edge cases to work:
- Backspace at the top-left of the document should do nothing
- Delete at the bottom-right of the document should do nothing
- Backspace at the start of the line should append the current line to the previous one
- Delete at the end of the line should append the next line to the current one.
To achieve this, we will need to create a way to append one line to another. Since we want to re-calculate the grapheme clusters, converting both lines to a string, merging them and re-creating the internal Ver<TextFragment> sounds like a good idea. Removing an entry from a Vec can be done by calling remove on it, which also returns the element which was removed.
Here is the assignment:
- Implement complex deletion as outlined above.
Assignment 17: Code Review
Aside from the fact that I am now starting to fix the bugs I am introducing (Unit Tests, anyone?), my code contained two interesting aspects. One revolves around Rust’s Borrow Checker, and one around side effects from traits. Let’s start with the first one.
Rust’s Borrow Checker in Action
We’ve met Rust’s approach to type safety already in earlier chapters. When it comes to modifying data, Rust imposes strict rules, particularly with how mutable and immutable references are handled.
Consider this function from my commit:
  pub fn delete(&mut self, at: Location) {
        if let Some(line) = self.lines.get(at.line_index) {
            if at.grapheme_index >= line.grapheme_count()
                && self.lines.len() > at.line_index.saturating_add(1)
            {
                let next_line = self.lines.remove(at.line_index.saturating_add(1));
                self.lines[at.line_index].append(&next_line);
            } else if at.grapheme_index < line.grapheme_count() {
                self.lines[at.line_index].delete(at.grapheme_index);
            }
        }
    }
The function accesses the current line twice: Once in the surrounding if let Some(line), and subsequently when calling append or delete. It’s impossible to refactor this code to use get_mut for the surrounding if let and get rid of that extra access. Why?
Memory Safety and Mutable References
Rust ensures memory safety by enforcing exclusive access to mutable data. The &mut self in the function signature means that while delete is executing, no other part of our program can modify the self struct (Line in this case). This is the same as borrowing a physical object: while it’s in your possession, nobody else can use it.
Excluding the initial if let, notice that self.lines (and thus self) is not altered while any reference to an element within self.lines is active. Removing next_line is a distinct operation that modifies self, followed by the call to append.
Why there isn’t a Borrow Checker Error
The question then is: Why doesn’t the reference line, derived from if let Some(line), trigger a borrow checker error? The answer lies in the timing and scope of its use. It’s only used once, before any mutating operation takes place. Afterwards, this reference becomes invalid. Adding any operation on line after the mutable operations begin, even a simple read, would invalidate the code and result in a compiler error.
Traits and Automatic Implementation
Let’s also discuss another code snippet from my commit:
impl fmt::Display for Line {
    fn fmt(&self, formatter: &mut fmt::Formatter) -> fmt::Result {
        let result: String = self
            .fragments
            .iter()
            .map(|fragment| fragment.grapheme.clone())
            .collect();
        write!(formatter, "{result}")
    }
}
The goal at this stage was to implement a to_string function which turns Line into a String, to be used for appending one Line to another. So why did I implement Display here?
Before I explain, I want to stress that not doing it like I did is a perfectly valid approach. I took this route to highlight some more interesting things about Rust - just implementing a simple to_string is fine.
What I implemented here is the Display trait. You might recall from previous chapters that this trait allows data structures to be printed out to the user, for instance with println!(“{my_struct}”);. Converting something into a string is such a common operation that a trait for this exists: ToString. There’s also a counterpart trait, which we also could have implemented: FromStr. As you already know by now, implementing traits gives you benefits in certain contexts. But what I wanted to point out here, and why I implemented Display, and not ToString, is that implementing some traits hands you an automatic implementation of another trait. We saw this in passing when we implemented the From trait and got the implementation of into for free - and in this case, we’re implementing Display, resulting in an automatic implementation of the ToString trait, which provides to_string. Display is generally considered more versatile than implementing ToString.
The underlying concept is called a blanket implementation: You can write a blanket implementation of Trait A for any type that implements Trait B, effectively making Trait B implementing Trait A as well.
Assignment 18: Tab and Enter
We still need to support two additional keys: Tab, which should simply insert a \t, and Enter.
To handle Enter, we need to extend Line in a way that allows us to split the line at the current location - shortening the current line, and returning a new Line with the remainder. Besides using push() to add an entry at the end of a Vec, we can use insert(index: usize) to add an item at the desired location. All following entries will be shifted to the right. A Vec also allows splitting by calling split_off.
Here’s a quick Rust Playground to illustrate this:
pub fn main() {
    let mut first_vec = vec!["Entry #1".to_string(),"Entry #2".to_string()];
    println!("{first_vec:#?}");

    for num in 4..=10 {
        first_vec.push(format!("Entry #{num}"));

    }
    println!("{first_vec:#?}");
    // Oops, missed something!
    first_vec.insert(2, "Entry #3".to_string());
    println!("{first_vec:#?}");

    let second_vec = first_vec.split_off(5);
    println!("{first_vec:#?}");
    println!("{second_vec:#?}");

}
Here’s the assignment:
- Handle
Tabby treating tab as an insertion of\t. - Handle
Enter:- If
Enteris pressed within aLine, split the line and create a new line from the remainder. - If
Enteris pressed at the beginning of a line, place a new, emptyLinebefore the current one. - Similarly, if
Enteris pressed at the end of a line, place a new, empty line after the current one. - If
Enteris pressed outside of a valid line (e.g. at the bottom of the document, where we allow navigating to), add a new, emptyLineto the end of the document. - Make sure you move the caret accordingly and that you scroll if needed.
- If
Code Review: Here’s my code.
Data Structures in Text Editors
We've now established our data structure for hecto. Stripping away the outer structs reveals that we store metadata for each visible grapheme within a vec. These vecs, which each represent a line, are then grouped within another vec. This arrangement is fairly typical for text editors handling formatted text. For instance, SlateJS, a JavaScript-based rich text editor, employs nodes to capture the formatting attributes applied to text segments, as shown below:
[
      {
        "text": "Hello,",
        "bold": true
      },
      {
        "text": " World",
        "bold": true,
        "underline": true
      },
      {
        "text": "!",
        "underline": true
      }
]
As you might imagine, finding and defining suitable data structures for text editors is a well-understood problem now, which includes reasoning about performance, types of insertions (i.e. do inserts typically happen around the same area, or randomly distributed across the text?) and other considerations. A common data structure for texts is a Rope. Ropes break texts into smaller, manageable pieces and organises them into a binary tree structure.
The beauty of a Rope lies in its efficiency—especially when you need to insert or delete text. With a Rope, these operations don't require shifting large blocks of text around, which keeps things running smoothly even as documents get longer. Navigating through text is also more efficient with a Rope, as each node in the tree keeps track of the text length below it, making it quick to jump to different parts of the document.
For this tutorial, we’re going to stick with our inefficient internal data structure, but if you’re interested to learn how to use a rope in Rust, take a look at Ropey.
Assignment 19: Saving to Disk
Editing is useless without saving, so let’s implement saving to disk for an existing file. We will implement “Save as” later.
To do so, we need to track the file name in the Buffer. Once the user presses Ctrl-S, we are going to save our file to disk.
Here is a small sample which writes a string to disk:
use std::fs::File;
use std::io::Write;

fn main() {
    let mut file = File::create("example.txt").expect("Could not create file");
    writeln!(file, "Hello, World!")
        .expect("Could not write to file");
}
Similar to println!, writeln! ensures that the line is written and a newline is added to the end.
Here’s the assignment:
- Keep track of the file name when loading a file from disk.
- When editing an existing file, implement the command
Ctrl+Sto save the file to disk. - For now, you can suppress any errors which might happen during saving, we will handle them properly later in this chapter.
Assignment 19: Code Review
We’ve discussed line breaks earlier in this tutorial, but there are some more interesting aspects to learn. We’ve already seen that there are multiple types of white spaces beyond a normal “Space’ - Tabs, Zero-Width-Joiners and more - so it’s unsurprising that there are also multiple types of line breaks. To name a few, there are Line Separators, Paragraph Separators, a Vertical Tab, and even Form Feed, which was used to direct the printer to eject the current paper and continue printing on top of another.
A second aspect to be aware of is that, to this day, operating systems have different views about what a new line actually is. Windows treats \r\n as a line break, whereas on Linux and Mac, a \n is sufficient. This is commonly referred to as “CRLF” (Carriage Return, Line Feed) for the Windows case, and as “LF” (Line Feed) for the Linux/Mac case. We’re slowly transitioning towards a state where this distinction does not matter, but opening a text file written on a Mac with an old text editor on Windows would lead to display issues, and executing a shell script on a Linux system written on Windows might also lead to issues.
hecto is elegantly side-stepping this issue, because of three reasons:
- The way we read in files handles newlines properly for us
- We do not directly work with newlines during text editing
- The way we save files, with
writeln!, also handles newlines properly for us.
User Interface
Our Text Viewer currently has no way of showing any information, besides the text itself, to the user. As a consequence:
- We can’t inform the user if a file-open or save was unsuccessful
- We can’t inform the user if a save was successful
- The user has to guess how to save a file
- We can’t offer the user a way to save their new files, because there is no way to display any input prompt with which the user could add their own file name.
That won’t do, so we’re going to build up some user interface which will display useful information to the user, before we adapt it to also handle prompts. More specifically, we’re going to add two lines to the bottom of the editor: A status bar, which will hold information about the document, and a message bar, which will show notifications to the user. Later, we will use the message bar also to allow user input.
Assignment 20: Simple Status Bar
Let’s start very basic:
- Adjust
hectoto leave room for 2 additional rows at the bottom. - Add a status bar as the first of the two rows. It should contain:
- The file name if present
- The number of lines in the current file
- A line indicator to indicate in which line the caret is currently placed
- An indicator which shows if the file has been modified or not.
There is no need to care about formatting, alignment or handling any kind of string lengths at this point. We are going to make this pretty in the next step.
To implement this, you’d need to implement a new struct, which, similar to View, renders itself at the right part of the screen and refreshes itself every time it’s necessary. Then you’d need to expose the information you want to display from View to Editor, and pass it then to the new struct, so that it’s available on the next refresh.
Code Review: Here’s my code.
Assignment 21: Fancy Status Bar
Let’s make the status bar fancy. We want to:
- Arrange the data on the status bar
- Properly handle weirdly-sized terminals
- Make the line stand out visually.
Let’s start with the arrangement of the data. This is what we want to display:
hecto.rs - 23 lines (modified) 2/23
- We start with the file name (without the path), or
[No Name]if none is given. - We then display the number of lines in that file.
- If a document is modified, we show
(modified) - To the far right, we show the current line and the total amount of lines (in the example above: Line 2 of a total of 23 lines).
To make alignment easier, here’s a Rust Playground which shows you how to use string formatting for alignment:
fn main() {
    let left = "Left";
    let middle = "Middle";
    let right = "Right";

    println!("String Alignment with spaces:");
    println!("{:<15}{:^15}{:>15}", left,middle, right);
    println!();

    println!("Right align with dots:");
    println!("{:.>10}", "dots");
    println!();

    println!("Alignment in detail with different characters:");
    println!("{:.<15}{:-^15}{:#>15}", left,middle, right);
    println!();


    println!("Alignment where width < length:");
    println!("{:<3}{:^3}{:>3}", left,middle, right);
    println!();


    println!("Truncation:");
    println!("{:.5}", "Truncated");
    println!();

    println!("Truncation & Alignment:");
    println!("{:<15.3}{:^15.3}{:>15.3}", left, middle, right);
}
Link to Rust Playground / Link to the Docs
Let’s now define how hecto behaves on weirdly sized terminals:
- If the Terminal is less than 3 rows high, only the status bar and message bar are visible.
- If it is only 1 row high, only the message bar is visible.
- We assume that our terminal will be always at least 100 columns wide. For any terminal narrower than that, we are going to truncate or hide the information on the status bar.
- On a typical file, we expect the file name to be no longer than 50 characters.
- Since we have 50 more columns available, and the hard coded strings (including whitespaces) take up 22 columns, the line indicators can take up to 28 columns. So we will start having display issues if a file with a title that is 50 characters long and which contains more than a hundred million lines is open, and the current line is below the one hundredth million line. It’s fine to not optimise for that edge case.
Lastly, let’s investigate how we can make the row stand out visually. Crossterm lists a couple of attributes we can use , alongside a helpful list of cross-platform support. What we’re going to do is to make the Status Bar blink rapidly invert the foreground and background color for the status bar. To do so, we have to:
- Write out
Attribute::Reverseprior to printing the line - Print out the entire line until the edge of the screen
- Write out
Attribute::Resetto ensure that follow up write operations to the terminal are not printed out reversed.
crosstermprints out the correct escape codes for us - the command is called “Select Graphic Rendition” (SGR). Wikipedia has the full list of parameters.
Here’s the assignment now:
- Improve displaying of the status bar as outlined above.
- While we’re testing rendering, let’s also disable line wrap when starting hecto, and enable it upon exit, by using DisableLineWrap and
EnableLineWrap. This will remove artefacts from resizing (since we’re not drawing to the last line), and safeguard us against writing too long lines. - Let’s also set the terminal title to the file name. To do this, we can use SetTitle. We don’t have to restore the old title upon leaving, the terminal will do this for us.
Assignment 21: Code Review
There is one code snippet I’d like to discuss. Here it is:
    let mut position_y = 0;
    let mut is_visible = false;
    if let Some(result) = size
            .height
            .checked_sub(self.margin_bottom)
            .and_then(|result| result.checked_sub(1))
    {
            position_y = result;
            is_visible = true;
    }
        self.position_y = position_y;
        self.is_visible = is_visible;
Let’s pick this apart. We have seen and_then previously - it simply allows us chaining two operations. Essentially, we’re performing checked_sub twice. But what does it do?
This logic comes from the StatusBar and determines whether or not it should be rendered, and where. In View, we do this differently: we determine the height with saturating_sub, and if the view has a height of 0, it’s not displayed. StatusBar, however, has no height (or an implicit height of 1, but no internal field called height), so this logic can’t be used here. So what we do instead is that we subtract the margin and 1 from the terminal size. If the result would go below 0, StatusBar can be considered as invisible, as the starting point for the status bar would be outside of the visible bounds.
That’s what checked_sub does: It attempts to perform the subtraction. If successful, it returns the result. If not, in case of an underflow, it returns None.
Assignment 22: A Simple Message Bar
Now that our Status Bar is in place, let’s fill that final row with a Message Bar. This Message Bar will do a couple of things:
- Show a default text/help when opening
hecto - Show messages, like error messages, or other notifications
- Serve as an input area for prompts, such as prompting for the file name to save to.
We start, as usual, simple:
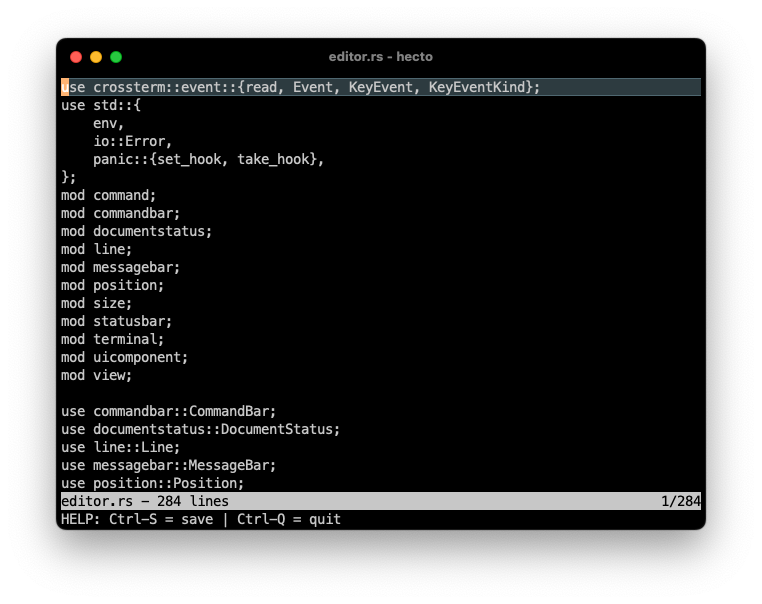
- Implement a Message Bar which reads
HELP: Ctrl-S = save | Ctrl-Q = quit - Since we have now 3 UI components, we are faced with quite some code duplication. Refactor your code to reduce code duplication as much as possible.
Code Review: Here is my code.
Assignment 23: Expiring Messages
We now want messages to disappear after at most 5 seconds. To achieve this, we will track the time at which a message has been rendered for the first time, and upon each re-render, we check if 5 seconds or more have passed. If so, we are going to hide the message.
To do so, we are going to use Durations and Instants. Let’s meet them in this Rust Playground:
use std::time::Duration;
use std::time::Instant;
use std::thread;


fn main() {

    let before_sleep = Instant::now();
    let five_seconds = Duration::new(5, 0);
    let seven_seconds = Duration::new(7, 0);
    let ten_seconds = Duration::new(10, 0);

    println!("Going to sleep now for seven seconds!");
    thread::sleep(seven_seconds); // Sleep for more than 5, but less than 10 seconds
    let after_sleep = Instant::now();

    if after_sleep - before_sleep > five_seconds {
        println!("Five seconds have passed!");
    }

    if after_sleep - before_sleep > ten_seconds {
        println!("Ten seconds have passed!");
    }

    let elapsed = after_sleep.duration_since(before_sleep); // Calculates the elapsed time
    println!("Actual sleep time: {} seconds and {} nanoseconds", elapsed.as_secs(), elapsed.subsec_nanos());

}
As a side note: Rust guarantees to sleep for at least the specified duration, but it can’t guarantee to sleep exactly for the given duration.
Here’s the assignment:
- Hide Messages after at least 5 seconds have passed.
Code Review: Here’s my code.
Assignment 24: Better Communication to the User
Let’s make better use of our Message Bar. We want to use our message bar to communicate a couple of errors we previously ignored to the user. For this, we need to propagate the error upward to the Editor, and then display it to the user. We also want to send a message in some non-error cases, for example when we save the file successfully to disk.
The challenge here, at least if your code looks similar to mine, is the following: At this point, we’re converting any crossterm event into an EditorCommand, and pass it down to View, which acts on it e.g. by saving. In order to properly react to an error, we could adapt handle_command to receive a Result and use MessageBar to display the error. But how do we know if the file has been saved successfully? Well, we could, for instance, check if the command we’ve just forwarded to View was a Save and if everything worked correctly print out the success message. That’s perfectly doable.
However, we’re already observing that what we’re getting from crossterm and passing on to Editor can be divided into editing commands - Delete, Insert(char) and so on - and other commands such as Quit, Save or Resize, which require a different behaviour. With that in mind, it makes sense to revisit EditorCommand and separate the different types of commands from one another.
With that in mind, here’s the assignment:
- If saving fails, display the message
Error writing file! - If opening a file fails, display the message
ERR: Could not open file:followed by the file name. - After successful saving, display the message
File saved successfully. - If the user tries to quit if a file is modified, display the following message:
WARNING! File has unsaved changes. Press Ctrl-Q {} more times to quit., where{}starts at 3 and counts down to 0. So in total, the user has to press CTRL-Q 3 times in order to quit with an unsaved file, discarding the changes. - Bonus Assignment:
- Separate your EditorCommands into different command types and adjust your code appropriately.
Code Review: Here is my code.
Assignment 25: Save as…
Currently, when the user runs hecto without any arguments, they get a blank file to edit but have no way of saving. Let’s work on introducing a prompt at the bottom, in place of the message bar, which allows the user to enter a file name.
We aim for simplicity here, so we are not going to build any asynchronous messaging or observer patterns or something similar. Instead, our Editor struct stays responsible for querying for status and updating itself, and other components, if needed.
Here is the assignment:
- Create a new UI Component called CommandBar.
- It should replace the Message Bar on press of
ctrl+sif the currently open file has no file name. - It should display the string:
Save As: - It should allow entering data, similar to how
Viewallows entering data. - It should truncate the displayed file name on the left in case of long paths/filenames to enter.
- It should expose the current caret position on screen to
Editor, similar to howViewdoes it. - It should expose the string entered to
Editor. - Hitting
Escshould dismiss the prompt without saving. We should displaySave aborted. - Hitting
Enterif data was entered attempts to save the current file to the given file name. - Dismissing the Command Bar should show the message bar again.
Code Review: Discuss as_ref, Path and PathBuf
Assignment 25: Code Review
Before we end this chapter, let’s take a closer look at a code change I made, because it helps us understand some design concepts and Rust concepts a bit better.
It’s about my FileInfo struct.
Here’s the updated code, with the relevant changes mentioned in the comments:
#[derive(Default, Debug)]
pub struct FileInfo {
    path: Option<PathBuf>, // No longer pub
}

impl FileInfo {
    pub fn from(file_name: &str) -> Self {
        Self {
            path: Somefrom(file_name),
        }
    }
	// New fn:
    pub fn get_path(&self) -> Option<&Path> {
        self.path.as_deref()
    }

	//New fn:
    pub const fn has_path(&self) -> bool {
        self.path.is_some()
    }
}
First of all, let’s discuss the motivation behind the code change.
Before we introduced a save_as functionality, there was ever only one FileInfo available, which was effectively immutable: Once set, the FileInfo never changed, and it either had a PathBuf (on loading a file) or it didn’t.
With the introduction of save_as, I had to decide: Is FileInfo something that is mutable - implying that a call to save_as would need FileInfo to update its path - or is it immutable - implying that one FileInfo needs to be replaced with another on file save?
I decided for the latter. I think it’s not terribly important for hecto right now to get this decision 100% right, but the code change above reflects my desire to keep FileInfo immutable: Instead of allowing direct access to path, I created a getter function, and I also exposed has_path as a convenience function.
This explains the why, but not the how - the code change above does two surprising things:
- It returns an
Option<&Path>instead of anOption<&PathBuf> - It calls
as_derefonself.pathto do so.
Why?
First, Path and PathBuf are very similar to String and str , which is why I used both in the code above. This allows transforming the code into something we know better - and which will make it easier for us to understand the as_deref. We do so by changing path in the struct as follows:
pub struct FileInfo {
    path: Option<String>,
}
Our first attempt to return path might look like this:
    pub fn get_path(&self) -> Option<String> {
        self.path
    }
This doesn’t work, and if you remember the Move Semantics we discussed earlier it becomes clear why: If we move String out, we can’t keep it ourselves - the existing Option would be invalidated. String does not implement the copy trait, so a copy of the path won’t be returned automatically.
That’s fine, we don’t need to copy or clone it anyway, since we do not plan to modify it. So how about this?
    pub fn get_path(&self) -> Option<&String> {
        self.path.as_ref()
    }
This works! as_ref turns the item within the option into a reference to that item, which is what we want. Working with &String instead of String can be tricky, but this is generally an approach that works. But what if we want to return a &str instead, given that there is no need for the overhead in String, it’s supposed to be readonly anyways. This leads us to:
    pub fn get_path(&self) -> Option<&str> {
        self.path.as_deref()
    }
as_deref does the opposite of as_ref above, and if you remember that dereferencing a String yields a &str, it’s easy to understand that now an Option<&str>, as desired.
Wrap Up & Outlook
In this chapter, hecto has gained a lot of functionality: Not only did we implement the ability to edit files, we also implemented a responsive User Interface and allowed the user to save their changes. We learned about data structures for Text Editors, and deepened our understanding of Rust’s ownership system in the process.
In the next chapter, we’re going to allow users to search.